How to Install Red Hat Enterprise Linux (RHEL) 9 ? RHEL 9 Installation Step by Step with Screenshots.
Red Hat Enterprise Linux(RHEL9) is a Linux distribution developed by Red Hat for the industrial market. Red Hat Enterprise Linux(RHEL9) is released in server versions for x86-64, Power ISA, ARM64, and IBM Z, and a desktop version for x86-64. All of Red Hat’s official support and training as well as with the Red Hat Certification Program, focuses on the Red Hat Enterprise Linux(RHEL9) platform. Red Hat Enterprise Linux is usually abbreviated to RHEL9.


Red Hat has finally released its most awaited OS RHEL 9 on 22th may 2019. RHEL 9 is based on fedora 28 distribution and UNIX operating system kernel version 4.18. One of the necessary key options in RHEL eight is that it’s introduced “Application Streams” that permits developers tools, frameworks and languages to be updated frequently while not impacting the core resources of base OS. In different words, application streams can help to segregate the users area packages from OS Kernel area.
Apart from this, there are several new options that are noticed in RHEL 9 like:


- XFS File system supports copy-on-write of file extents
- Introduction of Stratis filesystem, Buildah, Podman, and Skopeo
- Yum utility is based on DNF
- Chrony replace NTP.
- Cockpit is that the default web Console tool for Server management.
- OpenSSL 1.1.1 & TLS 1.3 support
- PHP 7.2
- iptables replaced by nftables
Minimum System Requirements for RHEL 9:
- 4 GB RAM
- 20 GB unallocated disk space
- 64-bit x86 or ARM System
Note: RHEL 8 supports the following architectures:
- AMD or Intel x86 64-bit
- 64-bit ARM
- IBM Power Systems, Little Endian & IBM Z
In this article we are going to demonstrate how to install Red Hat Enterprise Linux (RHEL) 9 step by step with screenshots.
Red Hat Enterprise Linux (RHEL) 8 Installation Steps with Screenshots
Step:1) Download Red Hat Enterprise Linux (RHEL) 9.0 ISO file
Download RHEL 9 iso file from its official website(Red hat),


https://access.redhat.com/downloads/
I am assuming you have the active subscription on redhat if not then register yourself for evaluation and then download ISO file
Step:2) Create Installation bootable media (USB or DVD)
Once you have downloaded RHEL 8.0 ISO file, make it bootable by burning it either into a USB drive or DVD. Reboot the target system where you want to install RHEL 8 and then go to its bios settings and set the boot medium as USB or DVD,
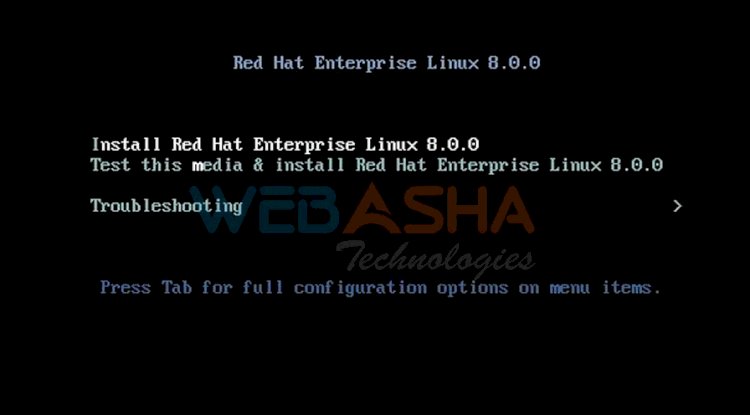
Step:3) Choose “Install Red Hat Enterprise Linux 8.0” option
When the system boots up with installation media (USB or DVD), we will get the following screen, choose “Install Red Hat Enterprise Linux 8.0” and hit enter button,
Step:4) Choose your preferred language for Red Hat Enterprise Linux (RHEL) 8 installation
In this step, you need to choose a language that you want to use for Red Hat Enterprise Linux (RHEL) 8 installation, so make a selection that suits to your setup please see below screenshot.
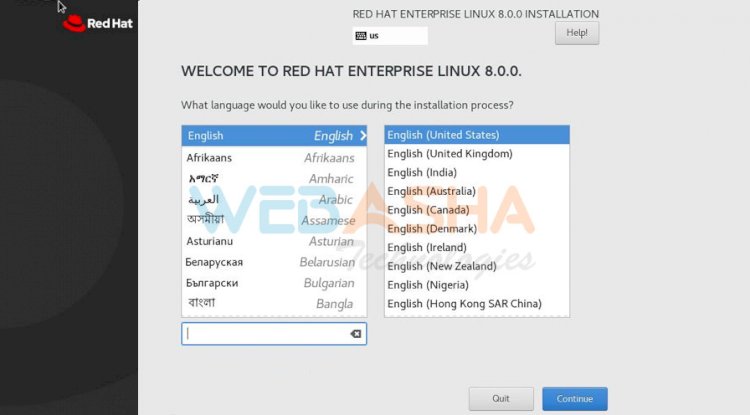
Click on Continue button
Step:5) Preparing Red Hat Enterprise Linux (RHEL) 8 Installation
In this step we will decide the installation destination for Red Hat Enterprise Linux (RHEL) 8, apart from this we can also configure the followings:
- Time Zone
- Kdump (enabled/disabled)
- Software Selection (Packages)
- Networking and Hostname
- Security Policies & System purpose
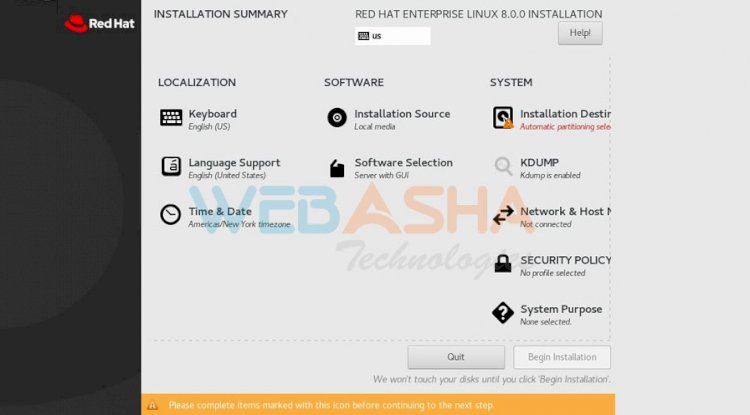
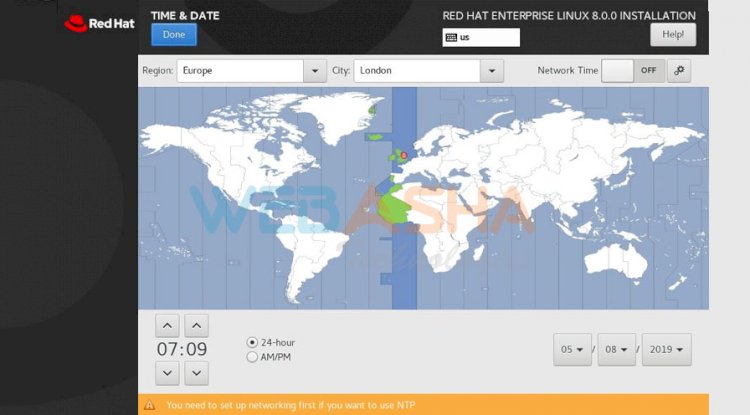
By default, installer will automatically pick time zone and will enable the kdump, if you wish to change the time zone then click on “Time & Date” option and set your preferred time zone and then click on Done.
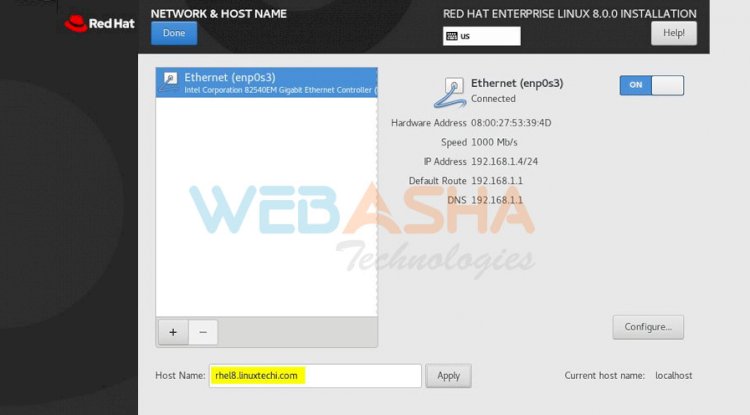
To configure IP address and Host-name click on “Network & Host-name” option from installation summary screen,
If your system is connected to any switch or modem, then it will try to get IP from DHCP server otherwise we can configure IP manually.
Mention the host-name that you want to set and then click on “Apply”. Once you are done with IP address and host name configuration click on “Done”
To define the installation disk and partition scheme for RHEL 8.0, click on “Installation Destination” option,
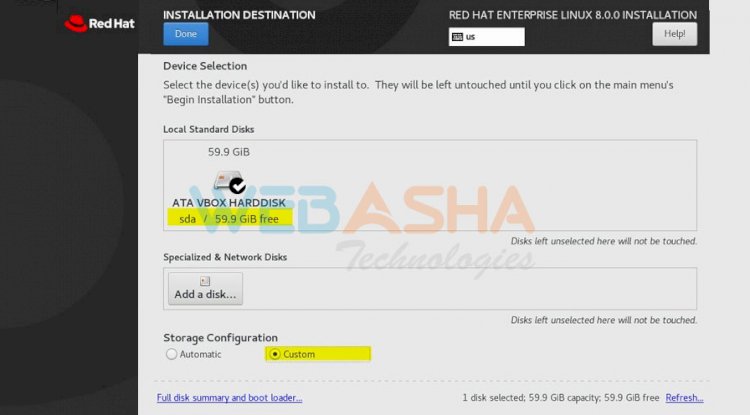
Click on Done
As we can see I have around 60 GB free disk space on sda drive, I will be creating following customize lvm based partitions on this disk,
- /boot = 2GB (xfs file system)
- / = 20 GB (xfs file system)
- /var = 10 GB (xfs file system)
- /home = 15 GB (xfs file system)
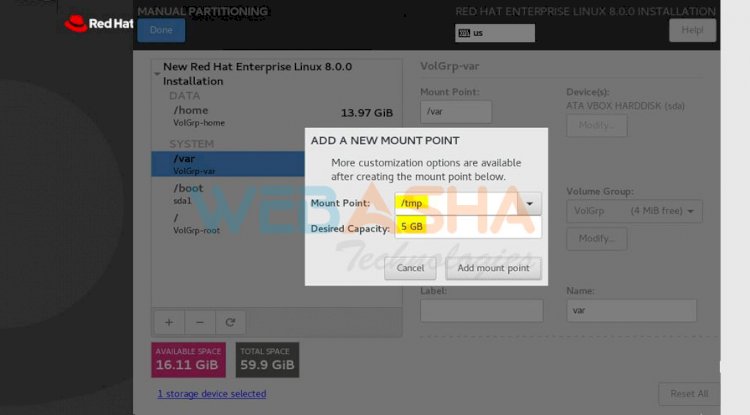
- /tmp = 5 GB (xfs file system)
- Swap = 2 GB (xfs file system)
Note: If you don’t want to create manual partitions then select “Automatic” option from Storage Configuration Tab
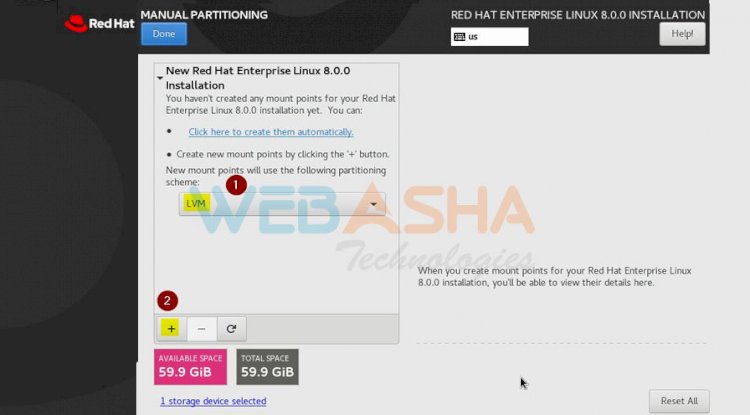
Let’s create our first partition as /boot of size 2 GB, Select LVM(Logical Volume Management) as mount point partitioning scheme and then click on + “plus” symbol,
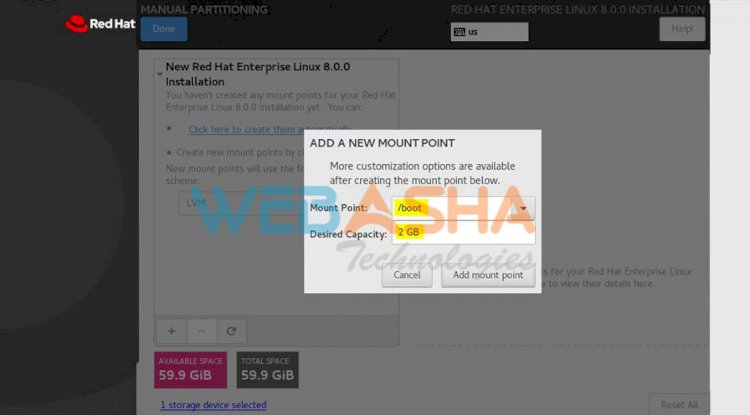
Click on “Add mount point”
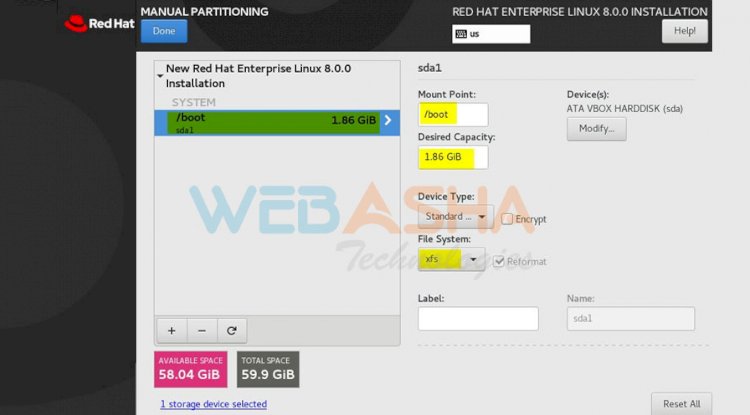
To create next partition as / of size 20 GB, click on + symbol and specify the details as shown below,
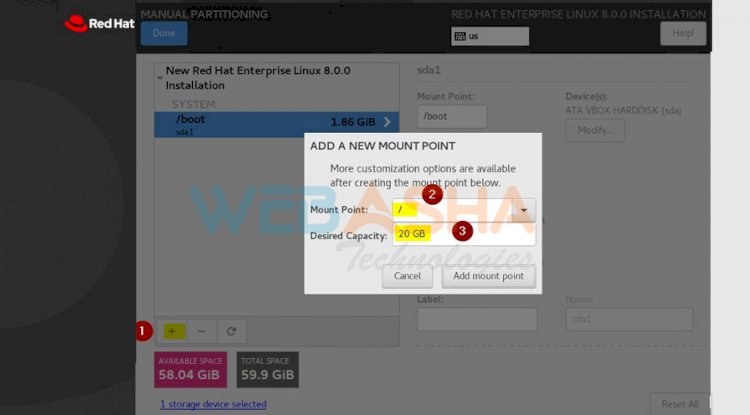
Click on “Add mount point”
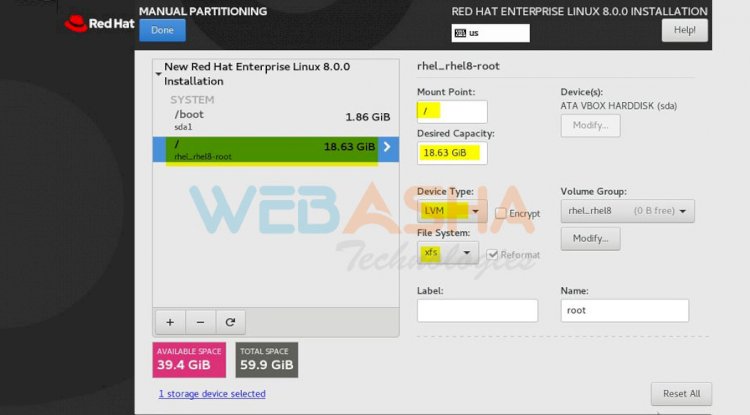
As we can see installer has created the Volume group as “rhel_rhel8“, if you want to change this name then click on Modify option and specify the desired name and then click on Save
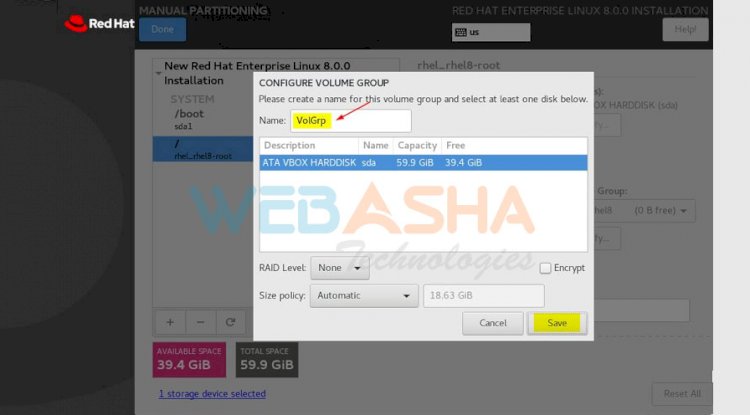
Now onward all partitions will be part of Volume Group “VolGrp”
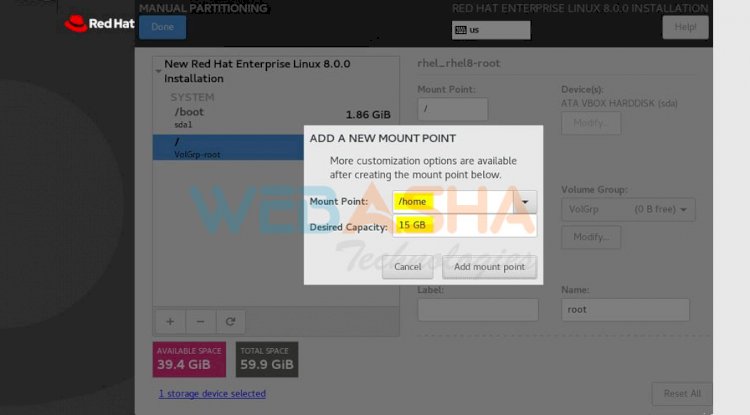
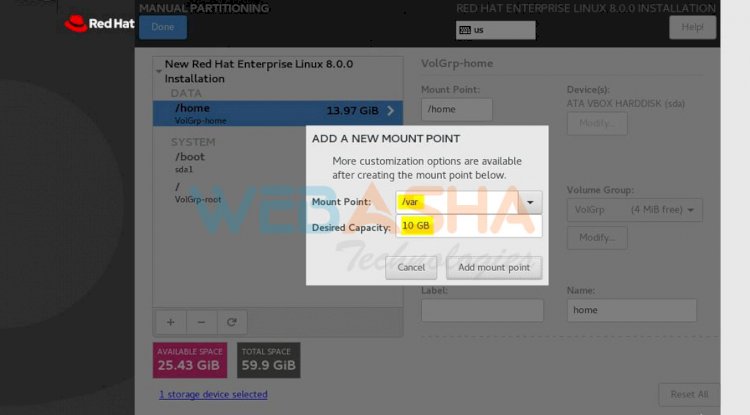
Similarly we create next three partitions /home, /var and /tmp of size 15GB, 10 GB and 5 GB respectively
/home partition:
/var partition:
/tmp partition:
Now finally we create last partition as swap of size of 2 GB,
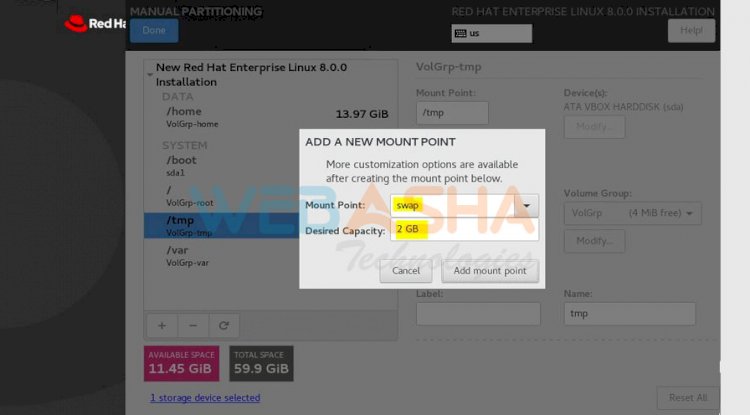
Click on “Add mount point”
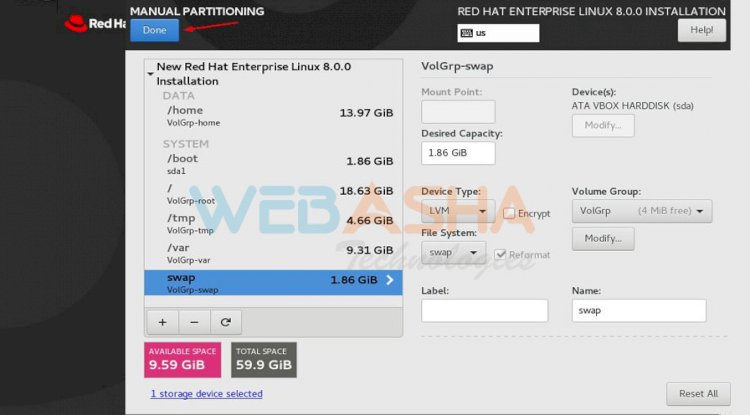
Once you are done with partition creations, click on Done on Next screen button, example is shown below
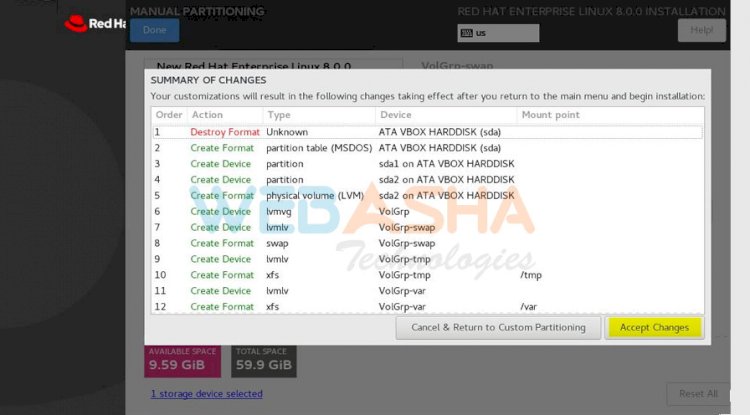
In the next window, choose “Accept Changes”
Step:6) Select Software Packages and Choose Security Policy and System purpose
After accepting the changes in above step, we will be redirected to installation summary window.
By default, installer will select “Server with GUI” as software packages and if you want to change it then click on “Software Selection” option and choose your preferred “Basic Environment Section”
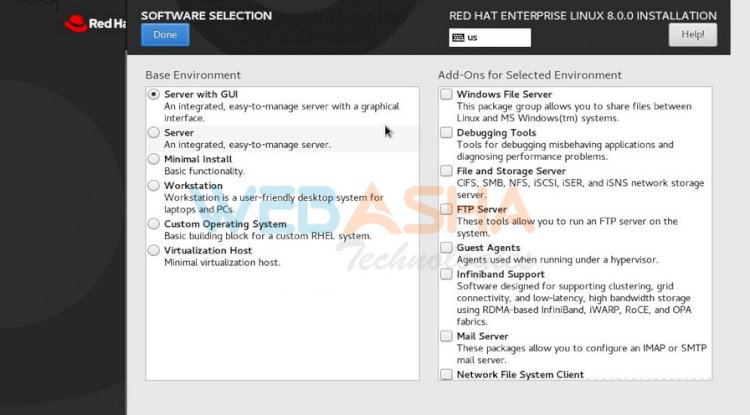
Click on Done
If you want to set the security policies during the installation, the choose the required profile from Security polices option else you can leave as it is.
From “System Purpose” option specify the Role, Red Hat Service Level Agreement and Usage. Though You can leave this option as it is.
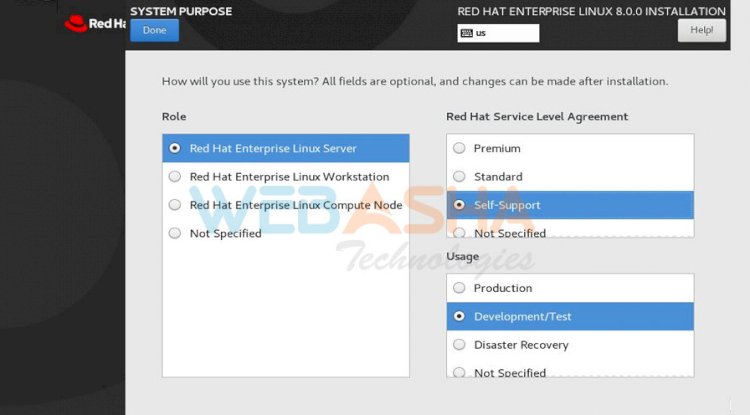
Click on Done to proceed further.
Step:7) Choose “Begin Installation” option to start installation Process
From the Installation summary window click on “Begin Installation” option to start the installation process,
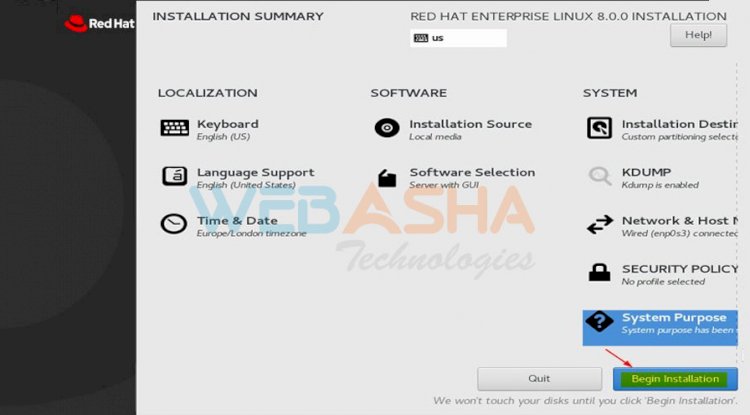
so we can see below Red Hat Enterprise Linux (RHEL) 8 Installation is started & is in progress
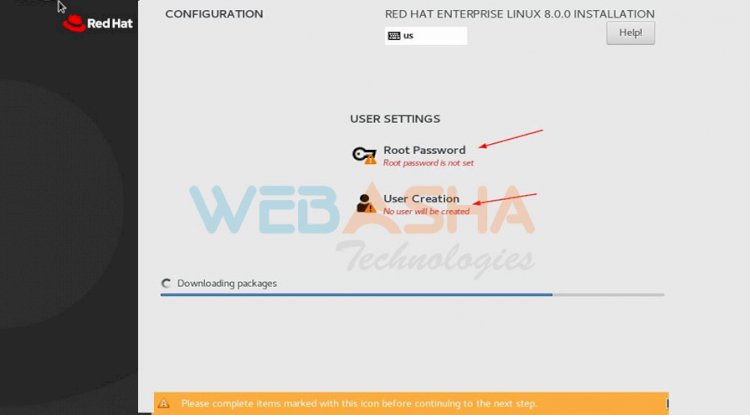
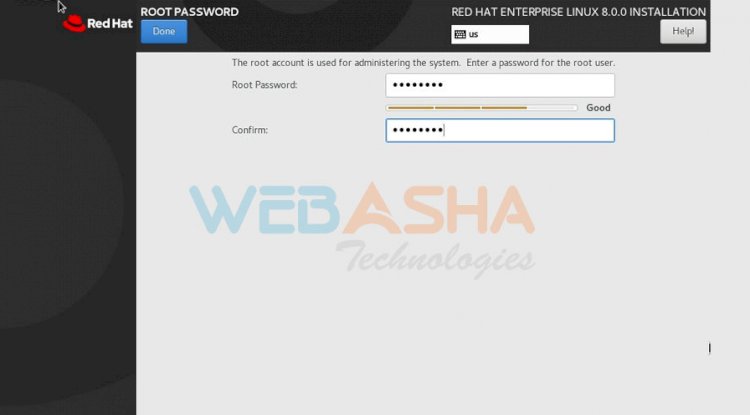
Set the root password,
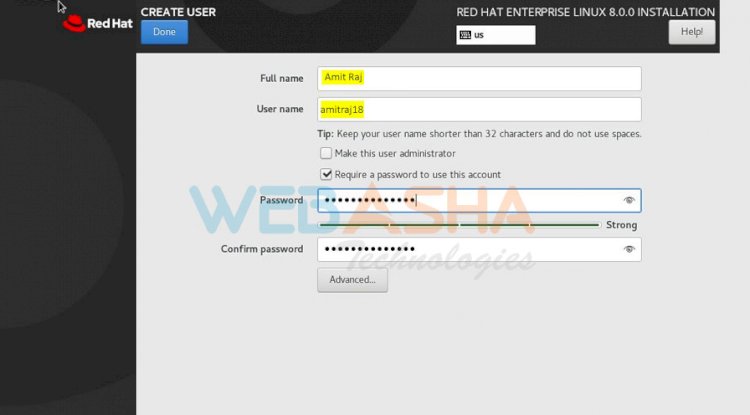
Specify the local user details like its Full Name, user name and its Strong password,
Once the installation is completed, installer will prompt us to reboot the system,
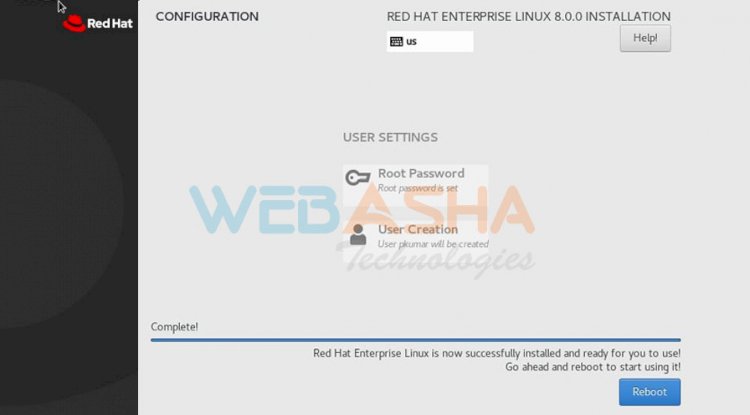
Click on “Reboot Button” to restart your system and don’t forget to change boot medium from bios settings so that system boots up with hard disk.
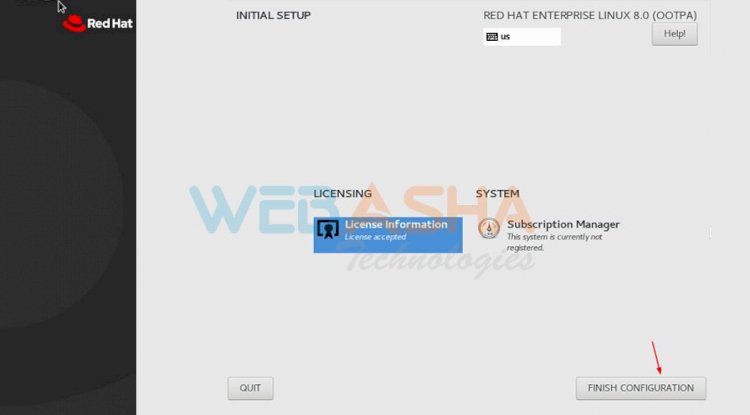
Step:8) Initial Setup after installation
When the system is rebooted first time after the successful installation then we will get below window there we need to accept the license (EULA),
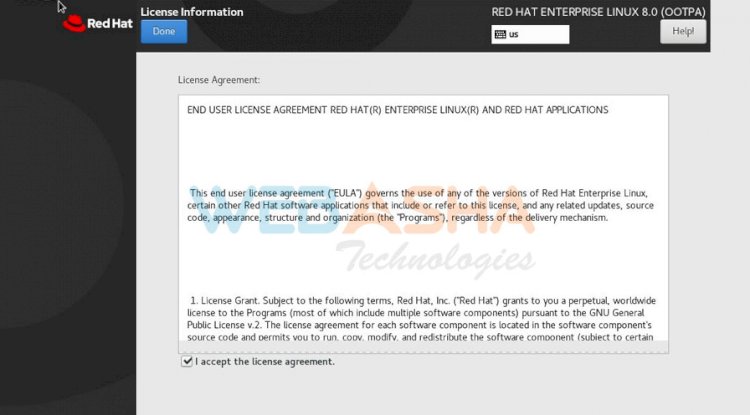
Click on Done,
In the next Screen click on “Finish Configuration”
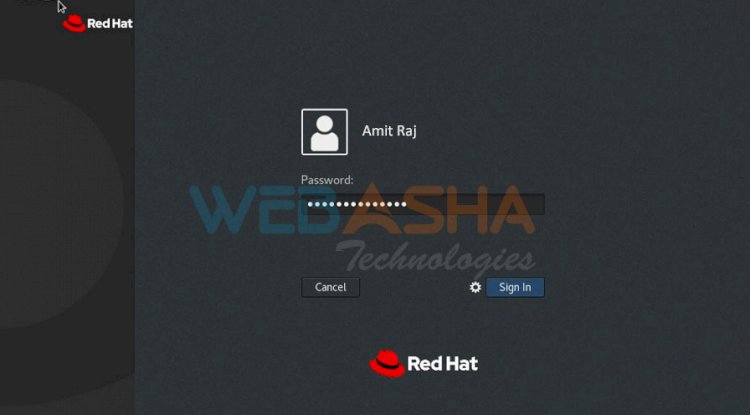
Step:8) Login Screen of RHEL 8 Server after Installation
As we have installed Red Hat Enterprise Linux (RHEL) 8 Server with GUI, so we will get below login screen, use the same user name and password that we created during the installation process.
After the login we will get couple of Welcome Screen and follow the screen instructions and then finally we will get the following screen,
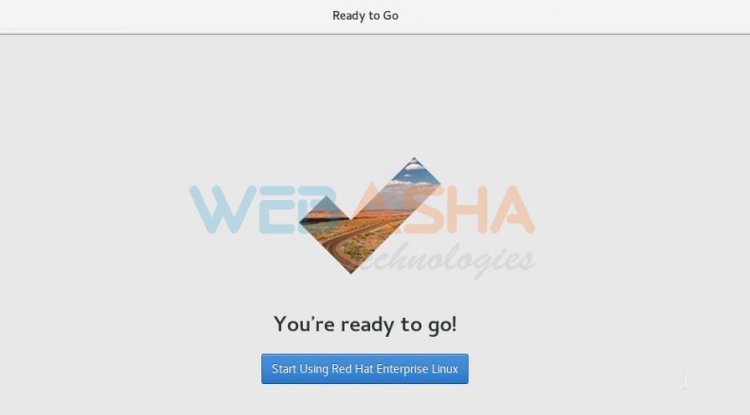
Click on “Start Using Red Hat Enterprise Linux”

This confirms that we have successfully installed Red Hat Enterprise Linux (RHEL) 8 , that’s all from this article. We will be writing articles on RHEL 8 in the coming future till then please do share your feedback and comments on this article.


![Top 10 Ethical Hackers in the World [2026]](https://www.webasha.com/blog/uploads/images/202408/image_100x75_66c2f983c207b.webp)