How can students build their first Linux lab for system administration, cybersecurity, and networking practice in 2026?
Building a Linux lab is essential for students in 2026 looking to master system administration, cybersecurity, and networking skills. By setting up virtual machines using tools like VirtualBox or VMware, students can install Linux distributions such as Ubuntu or Kali Linux. A typical lab includes configuring virtual networks, practicing command-line tools, and experimenting with ethical hacking software. Virtual labs offer flexibility, are cost-effective, and help prepare for certifications like RHCSA or OSCP. The guide also covers networking configurations, best practices, and real-world examples to help students avoid common mistakes.
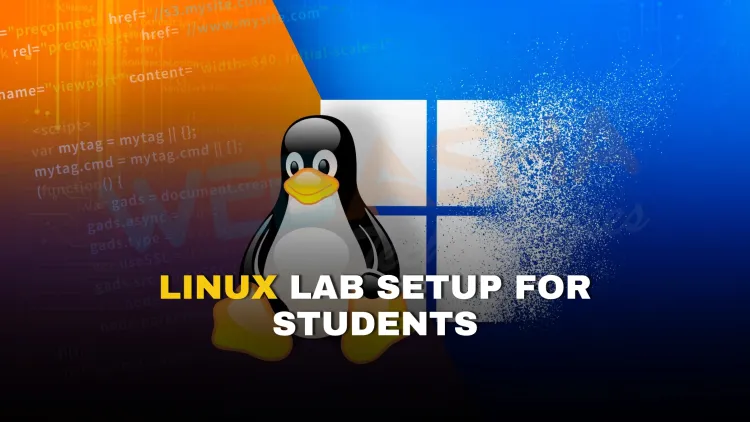
Quick answer: To build your first Linux lab, install a hypervisor such as VirtualBox, VMware or KVM on a host with 8 to 16 GB RAM and an SSD. Create virtual machines for distributions like Ubuntu, Kali Linux and Rocky Linux, keep them on an isolated network, and take snapshots before experiments. It is safe practice for RHCSA, Linux+ and ethical hacking.
Key takeaways
- Use VirtualBox or KVM with at least 8 GB RAM and an SSD.
- Create separate VMs for an attacker, a target and a server.
- Take snapshots before experiments so you can revert.
Table of Contents
- What Is a Linux Lab?
- Key Components of a Linux Lab
- How to Build Your First Linux Lab: Step-by-Step Guide
- Real-World Story: How a Student Built His Linux Lab
- Best Practices for Maintaining Your Lab
- Common Mistakes Students Should Avoid
- Virtual Lab vs. Cloud Lab Comparison
- Conclusion
A Linux lab helps students practice real-world Linux skills like system administration, cybersecurity, and networking, all in a safe, isolated environment. In 2026, whether you're studying RHCSA, OSCP, or simply learning Linux, having your own lab is essential.
What Is a Linux Lab?
A Linux lab is a personal environment where students install and experiment with Linux operating systems, tools, and networks without impacting real-world systems.
Why Is Building a Linux Lab Important for Students?
-
Hands-on learning for Linux system administration
-
Practice ethical hacking techniques legally
-
Prepare for certifications like RHCSA, Linux+, OSCP
-
Improve troubleshooting and scripting skills
Key Components of a Linux Lab
| Component | Description | Examples |
|---|---|---|
| Linux Distribution | Operating System for practice | Ubuntu, Kali Linux, Rocky Linux |
| Virtualization Tool | Runs virtual machines | VirtualBox, VMware, KVM |
| Hardware | Host machine specs | 8–16 GB RAM, SSD recommended |
| Networking Tools | Monitor network traffic | Wireshark, Nmap, Netcat |
| Security Tools | Ethical hacking, monitoring | Metasploit, OpenVAS, Snort |
How to Build Your First Linux Lab: Step-by-Step Guide
Step 1: Choose Your Setup Type
-
Virtual Lab (Recommended)
Host virtual machines on your laptop or desktop. -
Cloud Lab
Use AWS, Google Cloud, or Azure to host Linux VMs. -
Physical Lab
Set up using old PCs or Raspberry Pi devices.
Example:
Many cybersecurity students use VirtualBox to run Ubuntu Server and Kali Linux on laptops with 16 GB RAM.
Step 2: Install a Hypervisor
Recommended tools:
-
Oracle VirtualBox (Free, open-source)
-
VMware Workstation Player (Free for personal use)
Download from the official website and install it on your Windows, Mac, or Linux system.
Step 3: Download Linux ISOs
Use official websites:
-
Ubuntu: https://ubuntu.com/download
-
Kali Linux: https://www.kali.org/get-kali/
-
Rocky Linux: https://rockylinux.org/download
Make sure you verify file hashes for security.
Step 4: Create Virtual Machines
-
Allocate 2–4 CPU cores per VM
-
Assign 4–8 GB RAM for smooth operation
-
Allocate 20–40 GB storage
-
Attach ISO to VM and install Linux OS
Step 5: Configure Networking
-
NAT: For basic internet access.
-
Host-Only Networking: For isolating lab VMs from the outside internet.
-
Internal Network: For practice networks with no internet access.
Tools like Wireshark help monitor lab traffic.
Step 6: Install Basic Linux Tools
For system administration:
-
ssh, scp, rsync, tmux, vim
For networking:
-
Nmap, Netcat, traceroute, tcpdump
For cybersecurity:
-
Metasploit, Hydra, John the Ripper
Step 7: Practice Common Exercises
Examples:
-
Creating user accounts
-
Setting up Apache or Nginx servers
-
Configuring firewalls using iptables
-
Writing shell or Python scripts
Step 8: Use Snapshots and Backups
Before trying new configurations or attacks, create VM snapshots to revert easily if something breaks.
Real-World Story: How a Student Built His Linux Lab
Aarav, a cybersecurity student from Pune, set up a VirtualBox lab on his laptop. Starting with Ubuntu Server and Kali Linux, he practiced Linux commands, built mini networks, and eventually cleared RHCSA and OSCP certifications. His lab setup grew into 5–6 VMs simulating real-world corporate networks.
Best Practices for Maintaining Your Lab
-
Document all configurations
-
Update your Linux systems regularly
-
Use strong passwords and firewalls in your lab
-
Disable unnecessary services
Common Mistakes Students Should Avoid
-
Allocating too little RAM or storage
-
Forgetting to snapshot VMs
-
Leaving default passwords on test machines
-
Skipping updates and patches
Virtual Lab vs. Cloud Lab Comparison
| Feature | Virtual Lab | Cloud Lab |
|---|---|---|
| Cost | Free or minimal | Pay-per-use |
| Control | Full | Shared with cloud provider |
| Best For | Beginners, offline setups | Scalable professional practice |
Conclusion
In 2026, building your own Linux lab as a student is a powerful way to gain real-world IT skills. Whether you're training for certifications or want to experiment with security tools, a home Linux lab is both affordable and essential.
To take this further with guided labs and an instructor, see our Red Hat Linux training.
Related reading
- How to Set Up a Penetration Testing Lab in 2026: Tools, OS, Network Topology and Practice Scenarios
- Step-by-Step Guide to Configuring an OSINT Virtual Machine on Ubuntu | Secure and Efficient Intelligence Gathering Setup
- How to Gain Hands-On Experience with Linux | A Beginner’s Guide to Mastering Linux Skills
Reference
For the authoritative details, see Red Hat product documentation.
Frequently Asked Questions
What's Your Reaction?
 Like
0
Like
0
 Dislike
0
Dislike
0
 Love
0
Love
0
 Funny
0
Funny
0
 Wow
0
Wow
0
 Sad
0
Sad
0
 Angry
0
Angry
0

Vaishnavi is a skilled tech professional at the Ethical Hacking Training Institute in Pune, responsible for managing and optimizing the technical infrastructure that supports advanced cybersecurity education. With deep expertise in network security, backend operations, and system performance, she ensures that practical labs, online modules, and assessments run smoothly and securely. Her behind-the-scenes contributions play a vital role in delivering a seamless and secure learning experience for aspiring ethical hackers.

![Top 50+ Must-Know Linux Commands for Beginners [2026 Updated Cheat Sheet]](https://webasha-blog.s3.ap-south-1.amazonaws.com/uploads/images/202506/image_750x415_6856662f4638c.webp)